The Outdoor Apothecary is reader-supported. When you buy through links on our site, we may earn an affiliate commission. Learn more
As a lover of nature, I am always looking for ways to connect with the environment around me. One of my favorite ways to do this is by foraging for wild edibles, and one plant that I always keep an eye out for is the American elderberry, also known as Sambucus canadensis. This native plant is abundant in many parts of North America and has been used for centuries for its medicinal and culinary properties.
Identifying American elderberry is relatively easy, as they grow in large clusters on shrubs or small trees and have distinctive flat-topped clusters of small white flowers in the spring that mature into dark purple berries in the late summer or early fall. Harvesting them at the right time is crucial, as unripe berries can be toxic and overripe ones can be mushy and less flavorful. Once harvested, elderberries can be used in a variety of ways, from making jams, cordials, and syrups to brewing tea and wine.
In addition to their culinary uses, elderberries are also known for their health benefits. They are high in antioxidants and have been shown to have anti-inflammatory and immune-boosting properties. As a native plant, American elderberry plays an important role in supporting local ecosystems and can be a valuable addition to any backyard or garden.
As I venture out to harvest elderberries, I first seek out their natural habitat. American elderberry bushes are commonly found in moist areas such as along riverbanks, in fields, and at the edge of forests. They prefer full sun, but can also grow in partial shade.
I have noticed that elderberry bushes tend to grow in large clusters, making it easier to spot and harvest a significant amount of berries at once. I always make sure to properly identify any wild plants before harvesting. Here’s a list of my favorite books on foraging if you’re not sure where to start: Best Books about Northeast Foraging: My Favorites List
In addition to their preferred habitat, elderberries are also sensitive to pollution and pesticides. I make sure to avoid areas that are heavily sprayed with chemicals or near busy roads to ensure that the berries I harvest are safe for consumption.
Overall, I approach American elderberry harvesting with a reverence for the natural environment and a deep appreciation for the gifts that nature provides.
As a homesteader interested in self-sufficiency, harvesting American elderberries from the wild or my own shrubs is an important part of providing food and medicine for my family. The American elderberry shrub is not only delicious and nutritious, but can also be used to make syrups and tinctures that support immune health. However, in order to get the most out of my elderberry shrubs, it’s crucial that I harvest the berries at just the right time using proper techniques. In this article, I’ll share what I’ve learned about identifying when elderberries are ripe and ready for picking, as well as efficient methods for harvesting the delicate berries.
Knowing When To Harvest Elderberries
Timing is everything when it comes to harvesting elderberries. Picking the berries too early means they won’t be as sweet or nutritious. But waiting too long can mean losing berries to birds and other wildlife. Checking elderberry shrubs frequently as summer ends allows me to harvest at just the right stage of ripeness.
Here are the signs I look for to know when my elderberries are ready for harvest:
-
Color – The berries will change from bright green to a very deep purple almost black color when fully ripe. I avoid harvesting berries that still have green or red hues.
-
Texture – Ripe elderberries feel soft and plump when gently squeezed between the fingers. If the berry is still firm or hard, it needs more time on the bush
-
Drooping clusters – When clusters of elderberries are heavy with juice, they’ll start to droop downwards from the weight. This sagging indicates ripeness.
-
Taste – I’ll sample a couple berries right off the bush to check sweetness. The ripe berries should taste sweet with just a hint of tanginess.
Where I live, elderberries are typically ready for harvest between mid-August and early-September. But ripening times can vary depending on local growing conditions and weather. Tracking first bloom through fruit set in my elderberry patch helps me better predict prime harvest time each year.
Techniques For Harvesting Elderberries
Plucking ripe elderberries by hand is slow and tedious work. Through trial and error, I’ve come to rely on these techniques for quick and efficient harvesting:
Use Pruning Shears
The stems of the elderberry cluster are too woody to snap off barehanded. Trying to strip berries individually from each cluster is also time consuming. Pruning shears allow me to snip off entire clusters efficiently. I aim for clusters where at least 75% of berries look ripe.
Harvest Into Buckets
Because the ripe berries are delicate and juicy, I always harvest directly into clean buckets rather than baskets or bags. Plastic buckets keep the berries from getting crushed as I work. A wide mouth bucket is easier to drop clusters into. I bring several smaller buckets and transfer full ones to larger holding containers as I move through the shrub patch.
Use Tarps and Cloth Drapes
Despite my best efforts, some ripe berries inevitably fall to the ground while I’m snipping off clusters. Laying tarps or old bedsheets beneath each shrub helps catch stray berries knocked loose during harvesting. I can then easily gather these up to add to my bucket. Drapes hung on branches also give the berries a soft landing.
Shake Bushes Gently
For elderberry shrubs with a lot of unripe green berries still clinging to clusters, I’ll give branches a gentle shake after pruning off what’s ripe. This helps knock free any individual berries at their peak ripeness so I can catch them in my tarps and drapes below. But I’m careful not to shake the bush too aggressively or I risk damaging it.
Work Quickly And Carefully
This should go without saying, but it’s important to work steadily once I start harvesting. The longer ripe berries sit on the bush, the morelikely they are to fall off or get eaten by birds and other wildlife. But I also want to take care not to damage clusters or bruise berries in my haste. Finding that rhythm of quick yet gentle harvesting just takes practice.
Post-Harvest Care For Elderberries
Getting the fresh-picked elderberries out of the hot sun and into cool storage quickly is key. Here are my tips for handling the delicate berries after harvest:
-
Sort through clusters – I go through the harvested clusters and pick off any leaves, stems or unripe berries I missed in the field. The green parts can add a bitter taste.
-
Don’t wash before storing – Washing the elderberries right away can cause them to prematurely spoil. I wait to rinse them just before cooking or processing.
-
Refrigerate promptly – Once sorted, I transfer elderberries straight into covered containers or zipper bags and get them in the fridge. The cold prevents mold growth and preserves sweetness.
-
Freeze for long-term storage – For berries I can’t use right away, I spread them on cookie sheets and freeze until solid, then vacuum seal bags. Frozen elderberries are perfect for syrups and wines later on.
-
Work berries within 3-5 days – To ensure the best quality and flavor, I try to cook, dehydrate or process my harvests into jams, juices or tinctures within a few days of picking.
While elderberry harvesting requires careful timing and some specialized techniques, the work pays off in fruits ready for use both in the kitchen and medicine cabinet. Paying close attention to signs of ripeness, using efficient harvesting methods, and properly handling picked berries allows me to reap a flavorful and nutritious bounty from my elderberry patch each year. With practice, you can become skilled in harvesting techniques for optimal results as well.

Uses of American Elderberry
Elder is a plant that has been revered by homesteaders and herbalists alike for centuries due to its numerous uses. As someone who loves the bounty provided by nature, I have personally used elder for various purposes, and I am excited to share some of them with you.
First and foremost, ripe elderberries are edible and can be used in pies, jellies, jams, juices, syrups, and wine to name a few. They are rich in vitamin C and antioxidants, making them a healthy addition to any diet. I have personally used elderberries to make delicious jam, pie, and wine that myself and my family loves.
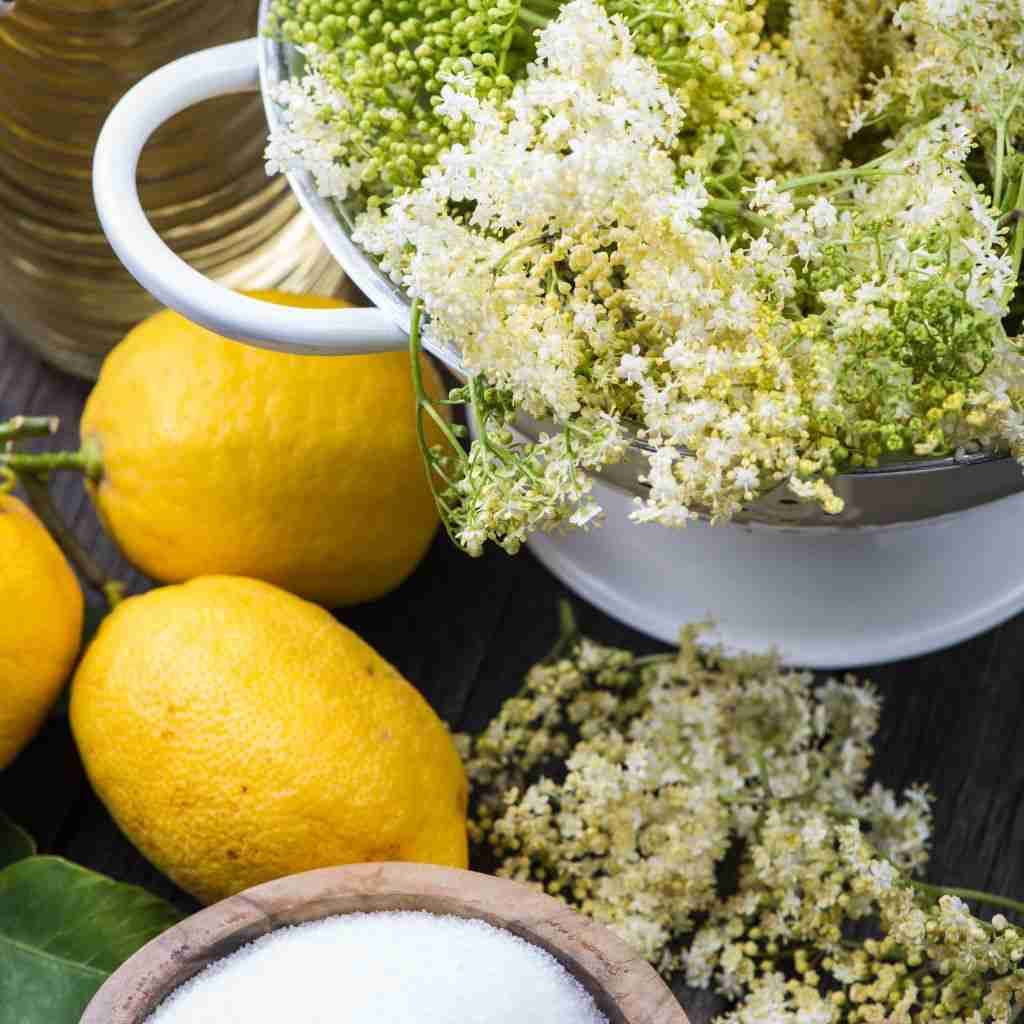
In addition to the berries, elderflowers can also be used to make various culinary delights. They can be used to make cordials, which can be added to pancakes, waffles, or even cocktails. The syrup has a sweet, floral flavor that is sure to impress anyone who tries it.
Elderflowers can also be used to make wine, which has a unique flavor profile that is hard to find in other wines. The wine has a light, floral taste that pairs well with light meals or as an apéritif. The flowers can also be used to make a tea that has a calming effect and can help with anxiety and stress.
Identification of American Elderberry
American elderberry is fairly easy to identify once you know what to look for. In fact, if you live in the Northeast, you’ve likely seen this amazing plant even if you didn’t know what it was.
American elderberry grows as a deciduous shrub or small tree that can grow up to 12 feet tall and can be recognized by its distinct leaf features, which are elongated with serrated edges resembling sawteeth. These leaves grow in opposing pairs, typically with 5 to 7 leaves on every stem. The veins of the leaf are highly noticeable as they diverge from the lighter green midrib. As they approach the leaf’s edge, the veins gradually fade and become narrower, without the prominent characteristic of ending in the valleys of the serrated edges.
Identifying American elderberry is most effortlessly done during its flowering stage. The American elderberry plant showcases a wide, flattened cluster of petite, creamy white flowers that can reach up to 10 inches in diameter and attract a variety of pollinators. These flowers exhibit petals with rounded tips, with five petals adorning each tiny blossom. Additionally, you will usually find five delicate white filament tubes emerging from the flower’s central region and terminating in a pale yellow tip, although there may be instances of only three or four tips originating from within the flower. In Eastern Connecticut, where I reside, these flowers typically begin to appear during the initial week of June.
Elderberries undergo a transformation from flowers to deep purple/blackish berries as they ripen. While identifying elderberries in their berry stage is generally straightforward, spotting elderberry plants during this phase can be challenging due to their ability to blend in with the surroundings. The process of transitioning from flowers to ripe berries typically spans a period of 6-8 weeks. In Connecticut, these berries reach their ripeness in late July and August.
Elderberries measure approximately 1/8th of an inch in diameter, resembling the size of a BB. Each rounded berry displays a distinctive bump where it originated from the flower. When consumed, they offer a slightly tart flavor. However, it is important to note that elderberries should not be eaten raw, as consuming more than a few can induce nausea. It is essential to exercise caution, as elderberries can be easily mistaken for other berries that may be poisonous. Always ensure that you correctly identify elderberry plants and remember to cook the berries before consumption.
Harvesting American elderberry each summer is a special moment for me. I approach the plant with reverence, knowing that I am taking a part of nature’s bounty for my own use. When it comes time to pick the elderberries, I use a pair of small pruning shears and snip the entire umbel of berries and carefully remove any insects.
Once I have harvested the Elderberries, I take them home and wash them thoroughly. I remove any stems and leaves and discard any unripe and mushy berries.
I am always amazed at the medicinal benefits that can be found in plants like Elder (Sambucus canadensis). The Elder plant has been used for centuries for its healing properties, and it continues to be a popular natural remedy today.
One of the most well-known medicinal benefits of Elder is its ability to support the immune system. The plant is rich in antioxidants, which may help to protect the body from harmful free radicals and reduce inflammation. This can help to prevent a wide range of illnesses and diseases, including the common cold and flu. In fact, every year I prepare an elderberry syrup that my family takes all winter to support our immune systems.
Elder is also believed to have anti-viral properties, making it an effective treatment for viral infections like herpes and shingles. The plant’s anti-inflammatory properties can also help to reduce pain and inflammation associated with these conditions.
Apart from its traditional uses for supporting wellness and promoting respiratory comfort, Elder is valued for its historical significance in folk remedies. It is often employed for maintaining respiratory health during seasonal changes. The plant’s properties are thought to aid in promoting respiratory comfort by supporting natural processes.
In summary, American elderberry holds a significant place in natural wellness practices. Whether you’re seeking to support your well-being, adapt to seasonal changes, or address occasional respiratory discomfort, exploring this plant may offer beneficial insights.
Health Benefits Of Elderberry AND How To Grow The BEST Elderberry Bushes!
FAQ
When to harvest American elderberry?
How long does it take for an elderberry bush to produce fruit?
How and when to take elderberry cuttings?
What time of year is it best to pick elderberries?