Daylilies are popular perennial flowering plants that produce colorful blooms throughout the summer. They are low-maintenance, hardy, and adapt well to various soil and light conditions. Propagating daylilies from seeds is an easy and fun way to get new plants. This article provides a step-by-step guide on how to plant daylily seeds successfully.
Why Grow Daylilies from Seeds?
There are several advantages to growing daylilies from seeds rather than buying nursery transplants:
-
It’s more economical Daylily seeds packets are inexpensive compared to purchasing individual plants,
-
You get more plants. A single seed packet can produce dozens of seedlings.
-
It enables you to grow new hybrids and varieties. Cross-pollinated daylily seeds produce unique flowers.
-
It’s an enjoyable gardening project Watching seeds grow into blossoming plants is rewarding.
When to Plant Daylily Seeds
Daylilies are hardy in USDA zones 3-9. They can be planted in spring once the danger of frost has passed or in fall in mild winter climates. The ideal soil temperature for germination is 70°F-75°F.
If starting indoors, plant the seeds 8-12 weeks before your last expected spring frost date. For fall planting, sow them at least 6 weeks before your first fall frost date.
How to Collect Daylily Seeds
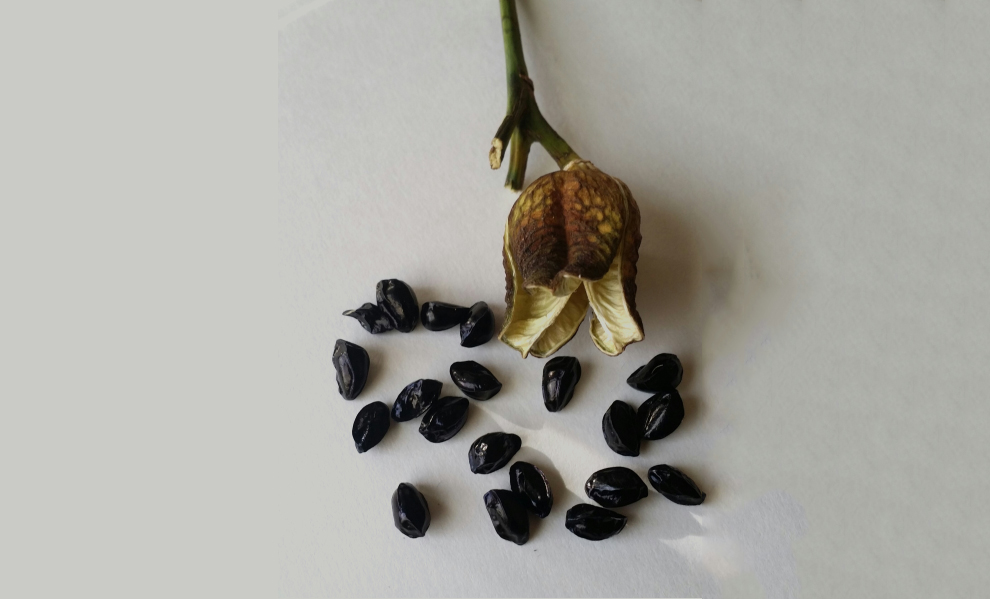
To get daylily seeds, allow some blooms to fade naturally on the plant. Seed pods will form where the flower was once the petals drop. Gather the dry, brown seed pods when they start to crack open, before they spill the seeds.
Store them in a paper bag in a dry spot for a few weeks. Then gently crush the pods to remove the small black daylily seeds. Store the seeds in envelopes or jars until planting time.
How to Plant Daylily Seeds Outdoors
Follow these steps for direct outdoor sowing:
Select a Site
Choose a spot that gets full sun to partial shade. Amend the soil with compost or organic matter to improve drainage. Daylilies thrive in moist, fertile soil.
Prepare the Soil
Work the soil to a depth of 12-18 inches. Break up any clumps and remove weeds, rocks and debris. Rake the top 2-3 inches smooth.
Sow the Seeds
Sprinkle the seeds on top of the prepared soil bed. Space them 4-6 inches apart to reduce overcrowding as they grow.
Cover with Soil
Cover the seeds lightly with 1/4 to 1/2 inch of fine soil or compost. Pat down gently.
Water and Label
Water the planted seeds well to moisten the soil. Label the area with the seed variety and date planted.
Provide Ongoing Care
Keep the soil moist until the seeds germinate, which takes 7-14 days. Thin seedlings to 12-18 inches apart. Weed and water as needed during the first year. Add mulch to retain moisture.
How to Plant Daylily Seeds Indoors
You can get a head start on the growing season by planting daylily seeds indoors. Here are the steps:
Use Sterile Seed Starting Mix
Fill cell packs or containers with a lightweight, sterile soilless mix made for seeds. Moisten the mix before planting.
Plant Seeds at Proper Depth
Sow 2-3 seeds in each cell, 1/8 to 1/4 inch deep. Gently water after planting to settle the seeds without washing them away.
Provide Warmth and Humidity
Place seed trays in a warm spot (70°F-75°F) with indirect light. Cover trays with plastic wrap or dome lids to retain moisture and humidity.
Wait for Germination
Keep the seed starting mix moist but not soaked. Seeds should sprout in 1-2 weeks. Remove the plastic/dome once sprouts emerge.
Thin and Transplant Seedlings
Clip off all but the strongest seedling in each cell when they produce 2-3 leaves. Transplant outside after hardening off when frost risk has passed.
Common Problems When Growing Daylilies from Seeds
Here are some potential issues and how to avoid them:
-
Poor germination: Ensure seeds are fresh, planted at the right depth, and kept evenly moist. Covering seeds with plastic helps retain humidity.
-
Damping off disease: Prevent fungal infection by not overwatering, providing good air circulation, and planting in sterile, well-draining soilless mix.
-
Leggy seedlings: Give young plants ample bright light. Supplement with grow lights if sunlight is limited.
-
Failure to thrive: Fertilize lightly when planting and provide adequate water and nutrients during the first year of growth. Monitor for pests like aphids.
Timeline for Growing Daylilies from Seeds
-
Spring planting: Sow seeds indoors 8-12 weeks before last frost. Move outdoors after hardening off at 4-6 weeks when frost risk has passed.
-
Fall planting: Sow seeds in flats 6 weeks before first fall frost. Grow indoors under lights over winter. Transplant out in spring after hardening off.
-
First year: Grow seedlings in a protected nursery bed. Expect 12-18 inch growth the first season under ideal conditions. Apply organic fertilizer monthly.
-
Second year: Transplant to permanent beds or containers in the garden. Provide routine care. Plants may flower this year, but bloom size and height will be small.
-
Third year: Daylily plants will be fully established and flower freely. Divide congested clumps after 3-5 years.
Growing daylilies from seeds is a simple, satisfying way to add vibrant color to your garden landscape. Follow proper planting, care, and harvesting techniques for a successful crop of lovely daylily plants.
Collect Seeds
If you want to experiment with creating new hybrid daylilies, then the first step is to cross-pollinate two parent plants with desirable characteristics, as Master Horticulturist Peter Lickorish explains:
“If you have a plethora of lovely day lily varieties and would like to control which ones you combine, you will need to do the cross-pollination yourself.
“You can use a cotton bud or even a pen, rubbed on clothing to generate static, as a way of collecting pollen and transferring it from the anthers of one flower to the stigma of a different plant.
“This is a long pin-shaped piece, in the centre of the flower. The flower can then be covered, such as with a sock tied tight with string or a similar method, to prevent further pollination, though remember their flowers are short-lived anyway.
“The genes will then mix in different proportions and some seedlings will grow on to be near copies of one parent, others varying mixes of the two.”
Once you have done this, you can then wait for the flowers to fade.
At this point, there is around a 50% chance that a seed pod will develop.
If a seedpod develops and ripens successfully, you can then collect the black seeds and prepare to sow them.
“Be aware that some of the bigger flowering Hemerocallis are tetraploids, meaning they have twice the normal number of chromosomes,” Peter adds.
“This complexity in breeding means that you may be able to get seed from them, but you may not be able to collect viable seed from their offspring.”
Sow The Seeds
Daylily seeds may be slow to germinate depending on temperature, but success rates can be good.
Often, they will germinate successfully when directly sown into a suitable spot in a garden.
However, in the UK, the best chance of success is to store seeds in your fridge for around six weeks and then sow them into pots or seed trays with peat-free potting mix, in a greenhouse or other undercover area in mid-spring.
Sow them to a depth of 1.5-2cm and keep the medium moist.
They should germinate within a couple of weeks if kept above 16°C.
Once the seedlings are large enough to handle, these should be pricked out into individual pots.
How to Grow Daylily Seeds (Growing Germination) Daylilies
FAQ
How long does it take for a daylily to bloom from seed?
He planted his seeds in rows directly in the ground in the fall. However he fumigated the soil first to kill all weeds. If you plant in the ground weeds may grow faster than the daylilies. Lastly remember that it may take 2-3 years for the daylilies to bloom.
Should daylilies be soaked before planting?
If a daylily arrives shriveled and dried out, a longer soaking may be necessary. But generally, soaking for a few hours is adequate. If one cannot plant for days, it would be better to heel in a plant.
Do I need to stratify daylily seeds?
In order to overcome the natural dormancy of daylily seeds, you must expose them to at least six weeks of cold, a process called stratification.Aug 1, 2014
How do you grow daylilies from seed?
Starting daylilies by seed is the simplest way. Like other plants, daylily plants start from seeds and grow into full-fledged plants. The trench should be 10 inches deep and three feet wide. Place daylily seeds 1/2 inch deep in the center of the trench. Cover them with about 1 inch of soil.
Can daylilies grow from seed?
However, most daylilies grown in the garden are hybrids–meaning that the seed-grown plants will not produce true to the parent. To do so, wait for a seed pod to dry on the stem to the point that is brown and about to burst open.
Where can I buy daylily seeds?
Foraging- check your daylilies in the fall for seed pods created by pollinators, which often contain viable daylily seeds. Daylily auction- a fabulous site for purchasing daylily seeds is the daylily auction, an international source for some of the newest hybrid crosses, and the auction can be lots of fun.